
The Jig It Drill Guide is an essential tool designed to enhance drilling accuracy and consistency. It simplifies complex projects by providing precise control, ensuring perfect hole alignment every time.
1.1 Overview of the Jig It Drill Guide
The Jig It Drill Guide is a versatile tool designed to assist in precise drilling operations. It offers a sturdy framework for aligning drill bits accurately, ensuring consistent results. The jig is ideal for both professionals and DIY enthusiasts, providing a reliable solution for various drilling tasks. Its compact design allows for easy maneuverability, while its adjustable features cater to different project requirements. Whether for woodworking, metalworking, or general repairs, the Jig It Drill Guide enhances accuracy and simplifies the drilling process, making it an indispensable addition to any workshop or toolbox.
1.2 Importance of Using a Drill Guide Jig
Using a drill guide jig significantly improves the precision and consistency of drilling operations. It minimizes errors, ensuring holes are drilled in the correct location and at the right angle. This tool is especially valuable for intricate projects where accuracy is critical. By reducing the risk of misalignment, it saves time and materials, making it a cost-effective solution. Additionally, it enhances safety by providing a stable setup, reducing the likelihood of accidents. For both professionals and hobbyists, a drill guide jig is an indispensable asset for achieving professional-grade results.

Design and Construction of the Jig It Drill Guide
The Jig It Drill Guide features a robust design with adjustable components, ensuring durability and versatility. Its precision-engineered alignment system guarantees consistent results across various materials and projects.
2.1 Materials Needed for the Jig
The Jig It Drill Guide requires durable materials like aluminum or steel for the frame, stainless steel for guide plates, and high-carbon steel bushings for precise alignment. Additional materials include screws, bolts, and optional rubber or silicone for the base. These components ensure stability, accuracy, and longevity, making the jig suitable for various drilling tasks. The selection of materials focuses on strength, corrosion resistance, and ease of use, ensuring the jig performs consistently across different projects and materials.
2.2 Tools Required for Assembly
To assemble the Jig It Drill Guide, you’ll need basic tools like screwdrivers, a wrench or socket set, and a measuring tool such as a caliper or ruler. A drill press is essential for precision drilling, while a vice can help hold parts securely. Clamps may also be useful for aligning components during assembly. Additionally, safety gear like gloves and safety goggles should be worn to protect yourself during the process. Having the right tools ensures accurate and efficient assembly of the jig.
2.3 Step-by-Step Assembly Process
Begin by unpacking and organizing all components. Attach the base plate to the main frame using the provided screws. Next, align the drill guide block with the base and secure it firmly. Install the adjustable stops and ensure proper alignment. Tighten all connections to avoid any movement. Finally, test the jig by drilling a trial hole to confirm accuracy. Refer to the manual for specific torque values and alignment tips to ensure a precise setup.
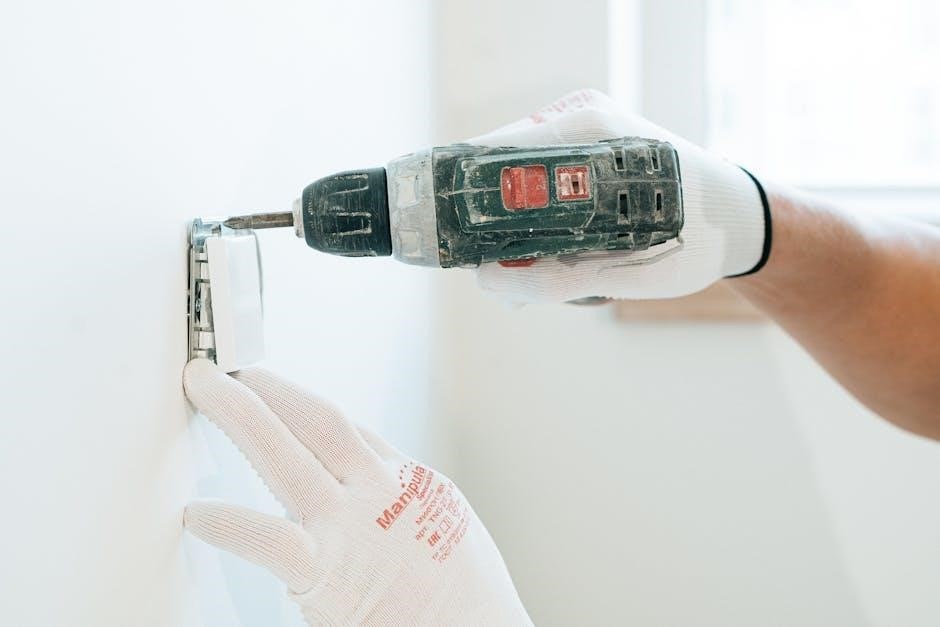
How to Use the Jig It Drill Guide
Align the jig with your workpiece, secure it firmly, and adjust the drill bit to the desired position. This ensures precise and consistent drilling results every time.
3.1 Preparing the Workpiece
Begin by cleaning the workpiece surface to remove dirt, dust, or grease. Ensure it is dry and free from obstructions. Mark the drilling locations clearly using a pencil or marker. Secure the workpiece firmly on a stable surface, such as a workbench, using clamps or a vice to prevent movement during drilling. Double-check that the workpiece is aligned properly with the jig’s guide holes to ensure accurate results. Proper preparation is key to achieving precise and professional-looking holes.
- Clean the workpiece thoroughly.
- Mark drilling locations accurately.
- Secure the workpiece firmly before drilling.
3.2 Aligning the Drill Bit
To align the drill bit, insert it into the jig’s guide hole, ensuring it is straight and properly seated. Adjust the drill bit to match the marked location on the workpiece. Use the jig’s alignment mechanism to secure the bit in the correct position. Double-check that the bit is parallel to the workpiece surface and aligned with the intended drilling spot. This step ensures precise hole placement and minimizes the risk of errors. Proper alignment is critical for achieving professional results.
- Insert the drill bit into the guide hole.
- Adjust the bit to align with marked locations.
- Secure the bit firmly in place.
3.3 Securing the Jig in Place
Securing the Jig It Drill Guide firmly ensures stability during drilling. Place the jig on the workpiece, aligning its base with the material. Use clamps or screws to hold it in place, applying even pressure to prevent shifting. Double-check that the jig is flush with the surface and evenly tightened. For added stability, ensure the workpiece is secured to a sturdy workbench. Properly securing the jig prevents movement and ensures accurate drilling results. This step is crucial for maintaining precision and avoiding errors.
- Align the jig with the workpiece.
- Use clamps or screws to secure it.
- Ensure even pressure and stability.
3.4 Drilling Accurate Holes
With the jig securely in place, begin drilling using steady, consistent pressure; Align the drill bit with the guide hole in the jig, ensuring it stays centered. Start at a slow speed to establish the hole, then gradually increase as needed. Maintain straight drilling to avoid bit deflection. Use the jig’s built-in depth stop to control hole depth. For precise results, keep the drill bit sharp and avoid applying excessive force, which could cause misalignment. This method guarantees clean, accurate holes every time.
- Start with slow, steady pressure.
- Keep the drill bit centered in the guide.
- Use a sharp bit for clean results.
Tips for Optimal Performance
Regularly clean and lubricate the jig to maintain smooth operation. Always use sharp drill bits and ensure proper workpiece setup. Practice consistent drilling techniques for best results.
- Keep the jig clean and well-lubricated.
- Use high-quality, sharp drill bits.
- Follow proper setup and drilling procedures.
4.1 Ensuring Proper Alignment
Proper alignment is critical for achieving accurate results with the Jig It Drill Guide. Always use the jig’s built-in alignment markers or clamps to secure the workpiece firmly; Double-check the position of the drill bit relative to the target area. For added precision, use a square or gauge to verify perpendicular alignment. Ensure the jig is flush with the workpiece to avoid any angular misalignment. Testing the setup on scrap material before drilling into your final piece can help confirm accuracy. Patience and attention to detail are key to ensuring proper alignment every time.
- Use alignment markers or clamps for precise positioning.
- Verify drill bit placement with a square or gauge.
- Test the setup on scrap material first.
4.2 Maintaining the Jig’s Accuracy
Maintaining the Jig It Drill Guide’s accuracy ensures consistent performance over time. Regularly clean the jig to remove debris and lubricate moving parts to prevent friction. Inspect the alignment pins and drill bushings for wear and replace them if necessary. Store the jig in a dry, secure location to avoid damage; Periodically recalibrate the jig using a precision square or gauge to ensure its alignment remains true. Proper care extends the jig’s lifespan and maintains its reliability for precise drilling operations.
- Regularly clean and lubricate moving components.
- Inspect and replace worn parts promptly.
- Recalibrate the jig for consistent accuracy.
4.3 Safety Precautions While Drilling
When using the Jig It Drill Guide, prioritize safety to avoid accidents. Always wear safety glasses and gloves to protect against flying debris. Ensure the workpiece is securely clamped or held in place to prevent unintended movement. Keep loose clothing or jewelry away from the drill area. Avoid overreaching, and maintain a firm stance for control. Never leave the drill unattended while in operation. Regularly inspect the drill bit for damage or dullness, as a worn bit can cause slippage or kickback. Follow the manufacturer’s guidelines for both the jig and drill to ensure safe and effective use.
- Wear protective gear like safety glasses and gloves.
- Secure the workpiece firmly before drilling.
- Inspect drill bits for damage or wear.
- Follow manufacturer instructions for safe operation;

Projects That Benefit from the Jig It Drill Guide
The Jig It Drill Guide excels in woodworking, metalworking, and DIY home improvement tasks, ensuring precise and accurate drilling for professional-quality results in various creative and functional projects.
5.1 Woodworking Projects
The Jig It Drill Guide is invaluable for woodworking projects, ensuring precise hole alignment in furniture making, cabinetry, and joinery. It simplifies tasks like drilling shelf pin holes, creating pilot holes for screws, or aligning dowels. Woodworkers can achieve consistent results, reducing errors and saving time. The jig’s accuracy is particularly beneficial for intricate designs, symmetrical layouts, and repetitive drilling operations. Whether crafting custom furniture or building cabinets, the Jig It Drill Guide enhances precision, leading to professional-grade finishes and durability in woodworking creations.
5.2 Metalworking Applications
The Jig It Drill Guide is equally effective in metalworking, offering precise control for drilling operations in materials like steel, aluminum, and brass. Its rigid design ensures accurate hole placement, crucial for projects requiring tight tolerances. Metal fabricators use it for tasks such as creating bolt holes, drilling pilot holes for tapping, or aligning multiple pieces. The jig minimizes errors, reduces material waste, and enhances efficiency, making it an indispensable tool for both hobbyists and professionals in metalworking environments.
5.3 DIY Home Improvement Tasks
The Jig It Drill Guide is a valuable companion for DIY home improvement tasks, ensuring precise drilling for projects like hanging shelves, assembling furniture, or installing fixtures. It helps homeowners achieve professional results by aligning drill bits accurately, even for intricate designs. Whether creating pilot holes for screws or drilling through various materials, the jig eliminates guesswork, saving time and reducing errors. Its versatility makes it ideal for tasks ranging from mounting TVs to building custom storage solutions, empowering DIY enthusiasts to tackle projects with confidence.

Maintenance and Storage
Regularly clean the Jig It Drill Guide with a soft cloth to prevent debris buildup. Store it in a dry, protective case to maintain accuracy and longevity. Inspect for wear and tear to ensure optimal performance.
6.1 Cleaning the Jig
Regular cleaning is crucial for maintaining the Jig It Drill Guide’s performance. Use a soft, dry cloth to wipe away dust and debris. For tougher residue, lightly dampen the cloth with water, but avoid harsh chemicals or submerging the jig in liquid. This ensures precision and prevents corrosion. Always dry the jig thoroughly after cleaning to maintain its accuracy and longevity. Proper care extends the tool’s lifespan and ensures consistent results in your projects.
6.2 Storing the Jig Properly
Proper storage is essential to maintain the Jig It Drill Guide’s accuracy and longevity. Store it in a dry, cool place, away from direct sunlight and moisture. Use a protective case or pouch to prevent scratches and dust accumulation. Ensure the jig is clean and dry before storage to avoid rust or corrosion. Organize your workspace by designating a specific area for the jig, keeping it secure and easily accessible for future projects. Proper storage ensures the tool remains in optimal condition and ready for use.
6.3 Inspecting for Wear and Tear
Regular inspection of the Jig It Drill Guide ensures its performance and longevity. Check the drill bushings for wear or damage, as they are critical for accuracy. Inspect the alignment pins and base for any signs of bending or cracks. Look for loose screws or components that may need tightening. Clean the jig thoroughly before inspection to identify any hidden damage. Addressing wear and tear promptly prevents accuracy issues and extends the tool’s lifespan. Regular maintenance ensures the jig remains reliable for precise drilling operations.

Advanced Techniques and Modifications
Advanced techniques and modifications unlock the Jig It Drill Guide’s full potential, enabling precise customization and enhanced efficiency for specialized drilling tasks and unique project requirements.
7.1 Customizing the Jig for Specific Needs
Customizing the Jig It Drill Guide allows users to tailor it for specific projects, improving efficiency and precision. By modifying the jig’s design, such as adjusting the drill bit holder or adding alignment fences, you can adapt it to unique drilling requirements; Materials like aluminum or steel can enhance durability, while adding features like adjustable stops or angled drilling attachments expand its versatility. These customizations ensure the jig meets the exact needs of your workspace, making it an indispensable tool for intricate tasks.
7.2 Adding Adjustable Features
Adding adjustable features to the Jig It Drill Guide enhances its versatility for various projects. Incorporating elements like sliding fences, adjustable stops, or rotational axes allows for precise control over drilling angles and depths. These modifications enable users to accommodate different materials and designs, ensuring compatibility with a wide range of tasks. By integrating adjustable components, the jig becomes a multi-functional tool, capable of handling complex drilling operations with ease and accuracy, making it adaptable to evolving project requirements and user preferences.
7.3 Using Different Drill Bit Sizes
The Jig It Drill Guide accommodates various drill bit sizes, allowing users to tackle diverse projects with precision. Whether working with small pilot bits or large spade bits, the jig ensures consistent alignment. Interchangeable bushings or adjustable collars can be incorporated to fit different bit diameters, maintaining accuracy across materials. This adaptability makes the tool indispensable for woodworking, metalworking, and DIY tasks, enabling users to achieve professional-quality results regardless of the drill bit size required for their specific application.
Troubleshooting Common Issues
Troubleshooting common issues with the Jig It Drill Guide involves addressing misalignment, drill bit slippage, and loose parts. Regular calibration and proper workpiece securing ensure optimal performance and accuracy.
8.1 Addressing Misalignment Problems
Misalignment issues with the Jig It Drill Guide often arise from improper setup or uneven workpiece surfaces. To resolve this, ensure the jig is securely fastened and the workpiece is flat. Check for debris or dust that might interfere with alignment. If misalignment persists, recalibrate the jig by adjusting its base or using shims for leveling. Always double-check the drill bit alignment before drilling to avoid off-center holes. Regular maintenance and proper storage can also prevent such issues from occurring.
8.2 Fixing Wobbling or Loose Parts
Wobbling or loose parts on the Jig It Drill Guide can disrupt drilling accuracy. Inspect all screws and bolts, tightening them firmly if necessary. Clean any debris or dust that may cause instability. If the jig base is uneven, use shims to level it. Replace worn-out components immediately, as they can lead to inconsistent performance. Regular maintenance, such as lubricating moving parts, can prevent wobbling and ensure smooth operation. Always ensure the jig is stable before drilling to maintain precision and safety.
8.3 Dealing with Drill Bit Slippage
Drill bit slippage can occur if the jig is not properly secured or if the drill bit is misaligned. To fix this, ensure the drill bit is correctly seated in the jig’s bushing and align it with the marked hole on the workpiece. Use a high-quality drill bit that matches the material being drilled. If slippage persists, lightly tighten the jig’s clamping mechanism to hold the workpiece firmly in place. Always maintain a steady drilling motion and consider using a pilot hole for better stability. Regular cleaning of the jig’s bushings can also prevent slippage issues.
The Jig It Drill Guide is an invaluable tool for precise drilling. Its ease of use and accuracy make it essential for any project, ensuring professional results.
9.1 Summary of Key Points
The Jig It Drill Guide is a versatile tool designed to enhance drilling precision and consistency. It simplifies complex projects by providing accurate alignment and control, ensuring professional results. Whether for woodworking, metalworking, or DIY tasks, this guide offers unmatched reliability. Its durable construction and easy setup make it a must-have for both professionals and hobbyists. Regular maintenance and proper storage ensure long-term functionality, making it a worthwhile investment for any workshop or project. This guide truly elevates drilling accuracy and productivity.
9.2 Final Thoughts on the Jig It Drill Guide
The Jig It Drill Guide is an indispensable tool for anyone seeking precision and consistency in their drilling tasks. Its innovative design and straightforward operation make it a game-changer for woodworking, metalworking, and DIY projects. By eliminating guesswork and ensuring accurate results, it empowers both hobbyists and professionals to achieve professional-grade outcomes. With proper care and maintenance, this guide will remain a trusted companion in your workshop for years to come, delivering unmatched value and reliability.