
Welcome to the comprehensive guide on ClosetMaid wire shelving installation. This guide provides step-by-step instructions and tips to help you successfully install your shelving system, maximizing storage space and ensuring durability. Whether you’re organizing a small closet or a large area, ClosetMaid’s versatile solutions offer flexibility and strength, making your project effortless and efficient. Follow along to transform your space with professional-grade results.
Overview of ClosetMaid Wire Shelving Systems
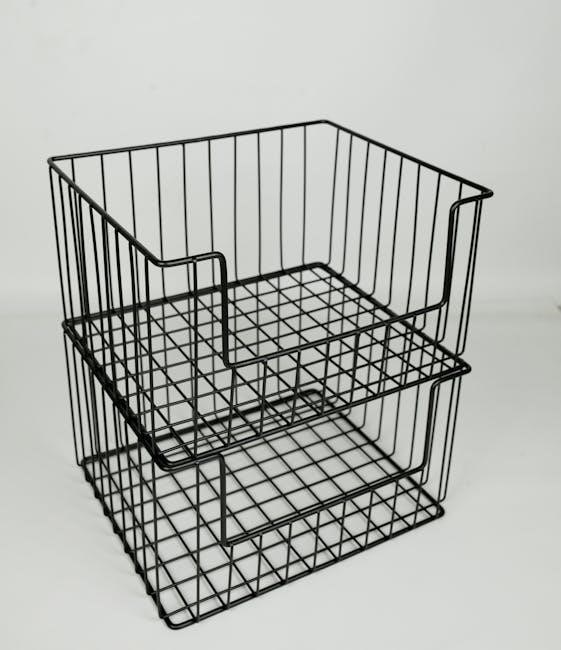
ClosetMaid wire shelving systems are versatile, durable, and designed to maximize storage space in closets, pantries, or garages. These systems feature adjustable shelves, robust steel construction, and a sleek design. They are easy to customize to fit specific needs, offering solutions for hanging clothes, storing shoes, or organizing accessories. The shelving is available in various lengths and depths, allowing for flexible configurations. With options for fixed or slide-out mounts, ClosetMaid systems cater to different preferences and spaces. Their wire shelving is known for its strength and ventilation, ensuring items stay dry and organized. These systems are ideal for creating a functional and stylish storage setup.
Importance of Following Installation Instructions
Following ClosetMaid wire shelving installation instructions ensures a safe, stable, and durable setup. Proper installation prevents issues like uneven shelves or loose brackets, which can lead to damage or safety hazards. Deviating from guidelines may result in weakened structures or improper load distribution, compromising the system’s integrity. Adhering to instructions also guarantees compliance with manufacturer warranties and safety standards. Always plan the layout, measure accurately, and use recommended tools and hardware. This attention to detail ensures a professional-grade finish and maximizes the shelving’s potential. By following the manual, you achieve a reliable and long-lasting storage solution tailored to your space and needs.
Benefits of ClosetMaid Wire Shelving
ClosetMaid wire shelving offers unmatched versatility and durability, making it a top choice for storage solutions. Its lightweight yet sturdy design allows for easy installation and customization to fit any space. The shelving can be cut to size using bolt cutters or hacksaws, providing flexibility for unique layouts. With various configurations, including double hang and long hang options, it caters to diverse storage needs. Additionally, its ventilated design prevents dust buildup, keeping items fresh. Low maintenance and easy to clean, ClosetMaid shelving ensures long-lasting performance; These features make it an ideal solution for maximizing space and organizing your closet efficiently.

Tools and Materials Needed
Essential tools: bolt cutter, hacksaw, drill, screwdriver, level, measuring tape. Materials: ClosetMaid wire shelving, wall clips, support brackets, anchors, screws, and shelf end caps.
Essential Tools for Installation
Bolt cutter or hacksaw: for cutting wire shelving and closet rods to size. Drill and screwdriver: for securing brackets and clips to walls. Level: ensures shelves are straight. Measuring tape: for precise measurements; Stud finder: locates wall studs for secure anchoring. Allen wrench: adjusts brackets and supports. Marker or pencil: marks wall positions. Gloves and safety goggles: protect during cutting and drilling. Gather these tools before starting to streamline the installation process and ensure accuracy. Proper tools guarantee a safe and professional-grade installation.
Required Materials for ClosetMaid Shelving
Wire shelving units: pre-cut or custom lengths. Wall clips: for securing shelves to walls. Support brackets: provide stability. Shelf end caps: finish shelf ends neatly. Closet rods: for hanging clothes. Hang tracks: attach rods to walls. Anchors: for drywall or concrete walls. Bolts and screws: for bracket assembly. Corner supports: optional for corner installations. Ensure all materials match your system’s specifications. Refer to your ClosetMaid shelving package for exact quantities and compatibility. Double-check the list before starting to avoid delays. These materials ensure a sturdy, functional, and visually appealing shelving system.
Recommended Safety Gear
Ensure a safe installation process with proper safety gear. Wear gloves to protect hands from cuts and abrasions. Use safety glasses to shield eyes from debris. A dust mask is essential when cutting materials to avoid inhaling particles. Secure footwear and avoid loose clothing that could get caught in tools. Use a sturdy ladder or step stool and always maintain three points of contact. Keep the work area clear to prevent tripping. Store tools safely and out of reach of children. Proper safety gear ensures a smooth and injury-free installation experience.
Preparation Steps
Begin by measuring the space to ensure proper fit. Clean and clear the area of obstructions. Cut wire shelving to size using a bolt cutter or hacksaw for precise adjustments.
Measuring the Space for Shelving
Accurately measure the width, height, and depth of your closet or storage area. Use a tape measure to determine the exact dimensions where the shelving will be installed. Check for any obstructions, such as electrical outlets or vents, and plan accordingly. Measure the length of the shelving units to ensure they fit seamlessly. Mark the wall with a pencil to guide bracket placement, ensuring level alignment. Double-check measurements to avoid cutting shelving unnecessarily. Proper sizing ensures a secure and functional installation, maximizing your space efficiently. This step is crucial for a professional-looking result.
Cleaning and Clearing the Area
Before starting the installation, thoroughly clean and clear the area where the shelving will be installed. Remove all items from the closet or storage space to ensure unobstructed access. Vacuum or dust the floor and walls to prevent debris from interfering with the process. Cover the floor and surrounding surfaces with drop cloths or plastic sheets to protect them from dust or damage. Check for any obstructions, such as nails or hooks, and remove them if necessary. Ensure the area is well-lit for visibility. A clean and clear workspace ensures a smooth and efficient installation process, allowing you to focus on precise measurements and secure fitting.
Cutting Wire Shelving to Size
Cutting ClosetMaid wire shelving to size is a crucial step for a precise fit. Use a bolt cutter or hacksaw to cut the shelving, ensuring clean, smooth edges. Measure the space carefully before cutting to avoid errors. Place the shelving on a stable surface, such as a workbench, and cut slowly to maintain control. Wear protective gloves and eyewear to safeguard against sharp edges and debris. After cutting, inspect the edges and file any rough spots to prevent damage to items placed on the shelf. Proper cutting ensures a seamless installation and optimal use of your storage space.

Understanding Wall Types
Identify your wall material (drywall, concrete, wood) to ensure proper installation. ClosetMaid systems work with various wall types, requiring specific anchors for stability and safety.
Identifying Wall Material (Drywall, Concrete, etc.)
Accurately identifying your wall type is crucial for a secure installation. Drywall walls require plastic or metal anchors, while concrete or brick walls need heavy-duty masonry anchors. ClosetMaid systems are compatible with various wall materials, ensuring stability. Use a stud finder for drywall to locate wooden studs for added support. For concrete walls, drill pilot holes and use anchor screws. Proper identification prevents damage and ensures shelves hold weight safely. Always refer to ClosetMaid’s guidelines for specific anchor recommendations based on your wall type to achieve a professional finish.
Choosing the Right Anchors for Your Wall Type
Selecting the correct anchors is essential for a secure ClosetMaid wire shelving installation. For drywall, use plastic or metal wall anchors to prevent screws from slipping. Concrete or brick walls require masonry anchors, which provide superior hold in dense materials. If installing on wood studs, opt for heavy-duty screws for maximum stability. ClosetMaid recommends specific anchor types for different wall materials to ensure weight distribution and safety. Always consult the manufacturer’s guidelines to match anchors with your wall type, guaranteeing a durable and reliable shelving system. Proper anchoring prevents damage and ensures shelves remain stable under load.

Installation Process
The installation process involves attaching wall clips, securing support brackets, and mounting shelves. Ensure all components are level and firmly fastened for stability and durability.
Step-by-Step Guide to Installing Wall Clips
Install wall clips by marking desired positions, ensuring they align with shelf lengths. Drill pilot holes if necessary, then screw clips into place. Use a level to ensure straight alignment. For added stability, space clips every 10 to 12 inches. Secure firmly to support shelf weight. Ensure clips are flush against the wall for proper fit. Double-check alignment before proceeding to bracket installation. Properly installed clips are crucial for a stable and durable shelving system. Follow manufacturer guidelines for optimal results.
Attaching Support Brackets to the Wall
Begin by marking the wall where the support brackets will be installed, ensuring they align with the wall clips. Drill pilot holes if needed, especially for concrete or drywall. Insert appropriate wall anchors to secure the brackets firmly. Tighten the screws until the brackets are flush against the wall; Ensure the brackets are level and evenly spaced to distribute weight evenly. Use a stud finder if possible for added stability. Properly installed brackets are essential for supporting the wire shelving and ensuring a sturdy setup. Follow the manufacturer’s guidelines for the recommended number of brackets based on shelf length and weight capacity.
Mounting the Wire Shelving onto Brackets
Once the support brackets are securely attached to the wall, carefully place the wire shelving onto the brackets. Ensure the shelf fits snugly into the bracket slots, aligning the edges properly. For stability, start by mounting the bottom shelf first, then proceed to the upper ones. Use a level to confirm the shelf is even and aligned with the wall clips. Gently rock the shelf back and forth to ensure it is securely seated. Double-check that all brackets are engaged and the shelf is level before adding any weight. This step ensures a stable and even installation for your ClosetMaid wire shelving system.
Installing Closet Rods and Hang Tracks
To install closet rods and hang tracks, begin by mounting the hang tracks to the wall using wall clips or support brackets. Ensure the tracks are level and securely fastened. Next, attach the rod support brackets to the hang tracks, spacing them evenly for optimal stability. Cut the closet rods to the desired length using a pipe cutter or hacksaw. Finally, place the rods onto the support brackets, ensuring they fit snugly. Double-check the alignment and stability of the rods before hanging items. This step completes the installation of a functional and durable closet organization system for your storage needs.
Advanced Installation Techniques
Customize your ClosetMaid system with corner shelves, double hang rods, and shoe shelves for enhanced functionality. Use corner supports and specialized brackets to maximize storage space efficiently.
Configuring Corner Shelves and Supports
Configuring corner shelves and supports enhances storage efficiency in tight spaces. Use corner shelf supports to connect shelves seamlessly in corners, ensuring stability and alignment. Measure the corner space accurately and cut shelves to fit using a bolt cutter or hacksaw. Attach corner supports to both shelves, aligning them properly for a secure fit. Ensure the shelves are level and sturdy by tightening all connections. For added stability, use pole clips (models 952 or 951) to secure the shelves to support brackets. This technique maximizes corner storage while maintaining the system’s durability and aesthetic appeal.
Installing Double Hang and Long Hang Rods
For a Double Hang configuration, place one shelf at 85 1/2″ high and another below it at 42″ for standard double hang heights. For Long Hang, position the shelf at 71 1/2″. Use hang tracks and rod clips (models 952 or 951) to secure the rods to support brackets. Ensure rods are level and aligned properly before tightening. Double-check the alignment to prevent uneven installation. This setup optimizes vertical space, accommodating double the storage for clothes or accessories. Follow manufacturer guidelines for rod lengths and cuts using a pipe cutter or hacksaw for precise fits.
Adding Shoe Shelf and Accessories
Enhance your closet’s functionality by installing a shoe shelf and accessories. Attach the shoe shelf to standard brackets at an angle for optimal storage. Use the Shoe Shelf Support to secure the shelf and ensure stability. ClosetMaid offers various accessories like shoe organizers, bins, and drawer systems to maximize space. Follow the manufacturer’s guidelines for cutting shelves to fit your specific needs. Properly align and secure all components to maintain structural integrity. These additions will help keep your closet organized, making the most of your available space while adding a touch of personalized convenience to your storage system.
Troubleshooting Common Issues
Troubleshooting common issues during ClosetMaid wire shelving installation can prevent major problems. Address uneven shelves by adjusting brackets, fix alignment issues with proper anchoring, and repair minor wall damage with spackling compounds or anchor replacements for secure and stable shelving systems.
Fixing Uneven Shelves
Uneven shelves can compromise the stability and appearance of your ClosetMaid wire shelving system. To fix this, start by loosening the support brackets and adjusting their positions to ensure the shelf is level. Use a spirit level to verify alignment. If the issue persists, check the wall clips for proper installation and tighten any loose screws. For shelves installed between walls, ensure the brackets are evenly spaced and securely fastened. If the shelf still sags, consider adding additional support brackets or consulting the installation manual for guidance. Proper adjustment ensures a stable and visually appealing setup.
Resolving Bracket Alignment Problems
Misaligned brackets can disrupt the stability and functionality of your ClosetMaid wire shelving system. To resolve this, start by ensuring wall clips are properly secured and aligned with the support brackets. If brackets are uneven, loosen the screws slightly and adjust their position using a level to achieve proper alignment. For persistent misalignment, check if the brackets are correctly matched to the shelf size and type. If necessary, adjust or replace the brackets to ensure they fit securely. Proper alignment is crucial for maximizing weight capacity and maintaining the structural integrity of your shelving system. Always refer to the installation manual for specific guidance.
Dealing with Wall Damage During Installation
If you encounter wall damage during installation, such as cracks or holes, address it promptly to ensure stability. For minor damage, use spackling compound to fill holes or cracks, allowing it to dry completely before proceeding. Sand the area smooth and repaint if necessary. For more significant damage, consider reinforcing the wall with a patch or consulting a professional. Properly repair any issues before installing ClosetMaid shelving to prevent further damage or instability. This ensures your shelving system is secure and functions as intended, maintaining the structural integrity of both the wall and the shelves.
Safety Tips and Best Practices
Always wear safety gloves and goggles to protect yourself from debris. Use proper anchors for your wall type and avoid overloading shelves. Ensure tools are in good condition and follow weight limits to prevent accidents and ensure a secure installation.
Ensuring Stability and Safety
Ensuring stability and safety is crucial during ClosetMaid wire shelving installation. Always use the correct wall anchors for your wall type to prevent shelves from tipping or collapsing. Double-check weight limits and distribute loads evenly to avoid overloading. Secure shelves firmly to wall clips and support brackets to maintain balance. Wear safety goggles and gloves to protect yourself from debris during cutting or drilling. Regularly inspect installed shelves for damage or loosening and make adjustments as needed. Proper installation ensures long-term durability and safety for your storage system.
Avoiding Common Mistakes
To ensure a successful installation, avoid common mistakes such as using incorrect wall anchors for your wall type or failing to level shelves properly. Cutting shelves without precise measurements can lead to poor fits, while neglecting to secure brackets tightly may result in instability. Overloading shelves beyond recommended weight limits can compromise safety and durability. Always follow the manufacturer’s instructions and double-check measurements before cutting or drilling. Proper planning and attention to detail will help you avoid these pitfalls and achieve a professional-looking, functional storage system that lasts. Regular inspections can also prevent issues before they arise.
Maintenance and Upkeep
Regularly dust and clean shelves to prevent dust buildup. Inspect for damage and tighten loose brackets. Ensure shelves remain level and stable for optimal performance and longevity.
Cleaning and Maintaining Wire Shelving
Regular cleaning is essential to maintain the durability and appearance of ClosetMaid wire shelving. Use a soft cloth or sponge with mild soap and water to wipe down shelves. Avoid harsh chemicals or abrasive cleaners that may damage the vinyl coating. For tougher stains, dilute white vinegar with water and gently scrub. Dry thoroughly to prevent water spots. Inspect shelves periodically for signs of wear or rust and address promptly. Proper maintenance ensures your shelving remains sturdy, functional, and continues to enhance your storage space effectively over time.
Inspecting and Replacing Damaged Parts
Regularly inspect ClosetMaid wire shelving for damage to ensure stability and safety. Check for rust, bent wires, or loose connections. If damage is found, replace the affected parts immediately. Use genuine ClosetMaid replacement components to maintain system integrity. For shelves, examine end caps and support brackets for wear. Replace any damaged brackets or clips to prevent shelves from collapsing. Closet rods and hang tracks should also be inspected for dents or corrosion. Replacing damaged parts promptly extends the lifespan of your shelving and maintains its functionality. Always follow manufacturer guidelines for replacement procedures to ensure a secure and reliable system.
Warranty and Manufacturer Support
ClosetMaid offers a limited warranty covering defects in materials and workmanship. For assistance, contact customer service at 1-800-874-0008 or visit ClosetMaid.com. Warranty terms vary by product, ensuring repairs or replacements for eligible issues, providing peace of mind for your storage solutions.
Understanding ClosetMaid Warranty Terms
ClosetMaid products are backed by a limited warranty covering defects in materials and workmanship. The warranty period varies by product, with most offerings a 5-year warranty. Coverage applies to original purchasers and is non-transferable. Exclusions include damage from misuse, improper installation, or normal wear and tear. For validation, product registration is recommended. To file a claim, proof of purchase and a detailed description of the issue are required. Refer to the official ClosetMaid website or contact customer service for full warranty details and terms. This ensures your investment is protected and provides peace of mind for your storage solutions.
Contacting Customer Service for Assistance
For any questions or issues with your ClosetMaid wire shelving installation, customer service is available to assist. You can reach them via phone at 1-800-874-0008 or visit their official website at www.closetmaid.com. Additionally, email support is accessible through the website’s contact form. Representatives are ready to provide guidance, troubleshooting, or replacement parts under warranty. Be prepared to provide your order number, product details, and a clear description of the issue for efficient support. ClosetMaid’s customer service aims to resolve inquiries promptly, ensuring your installation process remains smooth and stress-free.